


What You'll Need
- A laptop or desktop computer with a working webcam
- Google Teachable Machine — free, browser-based, no account or download needed: teachablemachine.withgoogle.com
- A clear space to move — at least 6 feet of open floor in front of the webcam
- A helper to hold poses (or a tripod if working solo)
- Optional: bright, contrasting clothing against a plain wall background — makes it much easier for the AI to detect body shape differences between poses
Dive In
Step 1 — Open Teachable Machine and start an Image Project
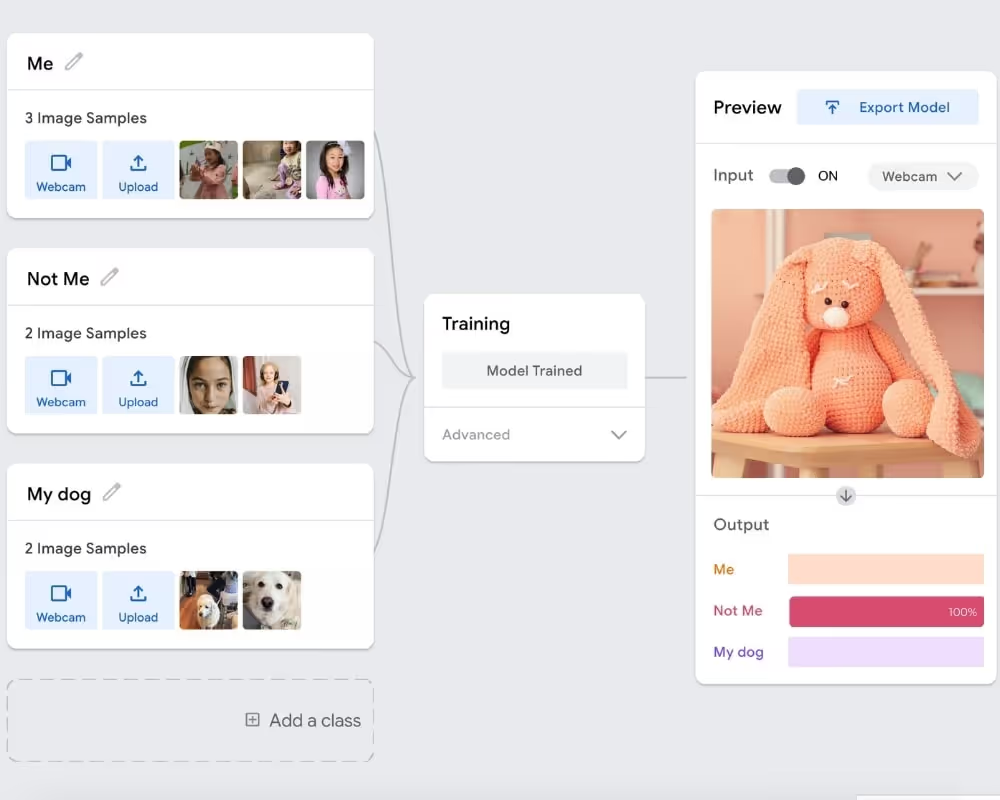
Go to teachablemachine.withgoogle.com and click "Get Started." Choose "Image Project" then "Standard image model." You'll see two default classes — Class 1 and Class 2. You can add more classes for each additional pose.
Step 2 — Name your pose classes
Rename each class to match the move you're teaching the AI:
- Class 1: Egg Roll
- Class 2: Cartwheel
- Class 3: Back Bridge (if testing)
- Class 4: Back Handspring (if testing)
- Add a "Standing Still" class — this is important as your neutral/baseline pose so the AI has something to compare against when no move is being performed
Step 3 — Gather your training photos for each pose
Click "Webcam" under Class 1 (Egg Roll). Get into the egg roll position and hold it. Click "Hold to Record" and take at least 30 photos. During recording:
- Shift your position slightly between shots — angle left, angle right, slightly closer, slightly further
- Try the pose from slightly different distances from the webcam
- Wear the same outfit throughout one session — the AI may pick up clothing color as a feature if you change between poses
Repeat for every class. 30 photos is the minimum — 50-80 per class produces noticeably more accurate results.
Step 4 — Train your model
Click "Train Model." The AI will process all your photos and learn the visual patterns that distinguish each pose. This takes 30 seconds to 2 minutes depending on how many photos and classes you have. A progress bar shows the training status.
The teaching moment here: explain to your child that this is the "brain building" step — the computer is looking at thousands of tiny differences between the egg roll shape and the cartwheel shape and creating rules to tell them apart.
Step 5 — Test it live
Once training is complete, click "Preview." Your webcam turns on and the AI starts identifying poses in real time. Have your child strike each pose and watch the confidence percentage bars change.
Try these tests to deepen the learning:
- The Imposter Test: Have a parent try the same poses — does the AI still recognise them? (It might not if it learned your child's specific body proportions)
- The Hybrid Test: Do a move that's halfway between two poses — watch the AI show split confidence
- The Retrain Test: Add 10 more photos of a pose the AI keeps getting wrong — does accuracy improve?
Step 6 — Export or screenshot your results
Teachable Machine allows you to export your model or download it. For this activity, a screenshot of the prediction bars during each correct identification is the perfect "proof of learning" to share or save.
The Teaching Moment - What to Tell Your Child After Each Step
Explore More AI Projects
Enjoyed building your first pose recognition model? Here's where to go next depending on what sparked your child's curiosity:
- 🐶 Just getting started with Teachable Machine? → AI Puppy Detective: Train a Computer to Recognise Your Dog — the simplest entry point, ages 6+
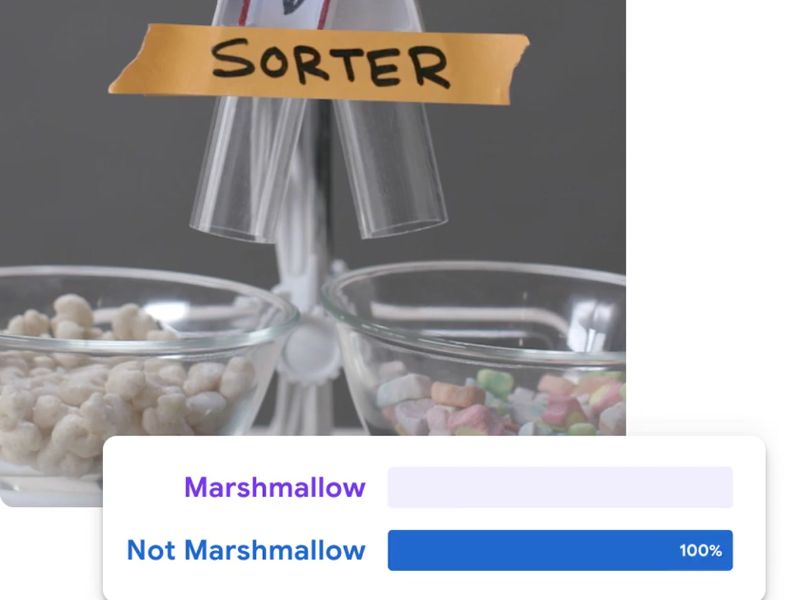
- 🍬 Want to try image classification with objects instead of bodies? → Candy vs Not Candy: Your Kid's First Machine Learning Experiment — trains an AI to sort objects using a webcam
- 🎯 Ready to explore pre-built AI rather than training from scratch? → AI Face Recognition Game for Elementary Kids — uses PictoBlox's pre-trained emotion detection, no training required
- 📖 Want to understand the bigger picture? → Machine Learning for Kids: Free Tools & Activities Guide — the parent guide covering how machine learning works, which tools to use by age, and what equipment your child actually needs

A Child Development Specialist and a proud mom of 3 in the Bay
%20(300%20x%20250%20px)%20(1).avif)
-min.avif)